When we purchased our current house, the previous owner, an old guy with failing health, stacked a bunch of wood near the back slider door. It was just under the roof’s overhang where water would splash up. Of course, the siding on the house behind the wood was punky and wet. Not a good solution for wood storage!
Don’t store firewood next to the house. It creates a home for water, bugs and rodents. Experts suggest storing firewood at least ten feet from any structures. But keep in mind you will need a path to the firewood pile in winter so plan accordingly.
The goal of wood storage is to move it as few times as possible. You want your wood dropped off out of the way but close enough so that in the middle of winter it’s not too hard to fight the elements to find it.
At our house, I had a few considerations for a wood storage location.
- It needed to be in the sun to dry out properly.
- It needed to get some airflow so not too close to the house.
- I needed room to park the truck and get around it.
- I wanted it close to the driveway in case I run out of homegrown wood and need to have some delivered.
- It had to be within a logical snow-blowing path and not block future snow-plowing ability if I need to switch to a snow-plow guy.
- I have a limited area around the house due to the woods and filled areas.
- The roof of the shed needed to shed snow and rain away from the house.
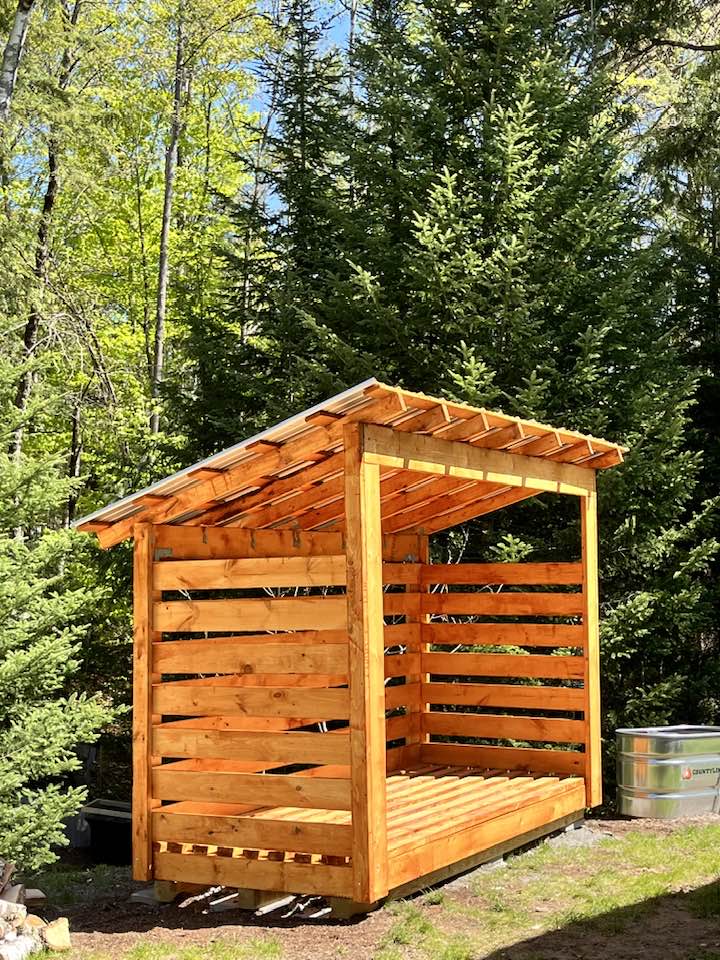
I settled on a location 12 feet out from the garage which would provide enough room to park a car. The roof pitch would send snow and rain out and away from the house and not block access to the wood pile.
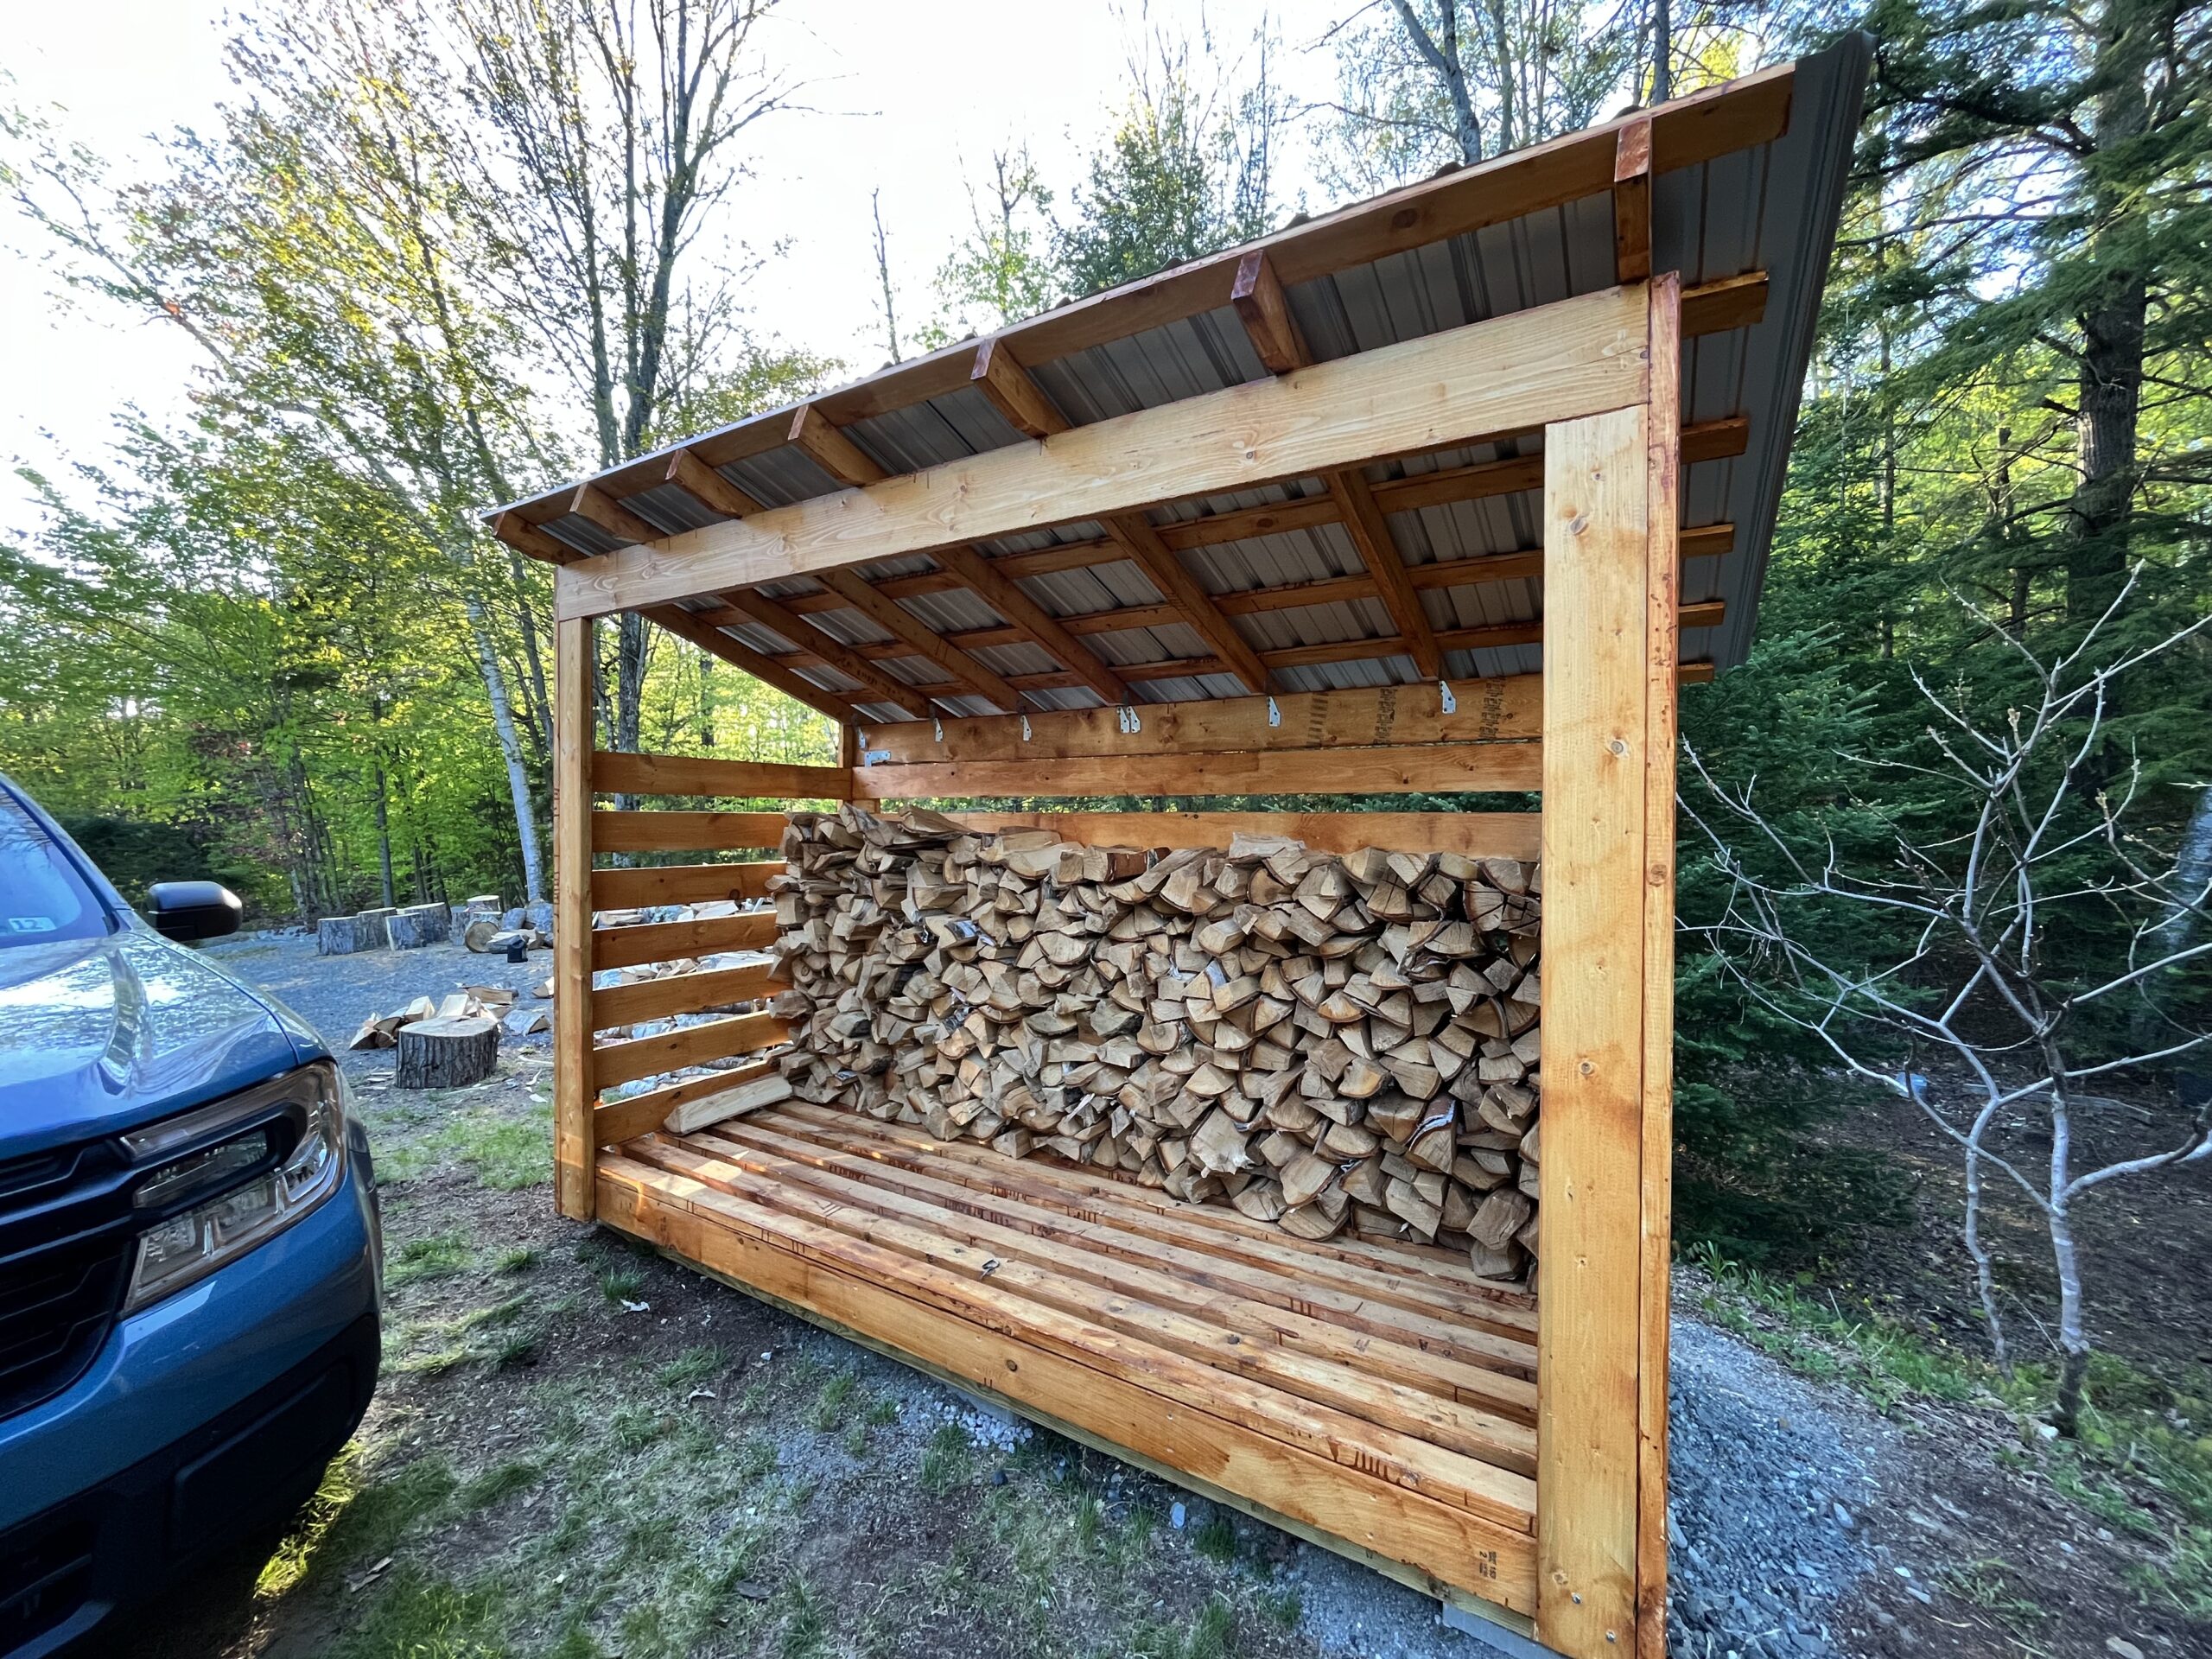
I built my wood shed – a nice 4 x 10 feet tall one. That took care of about a cord and a half of wood. But then my neighbor lent me his 22-ton wood splitter and after three days of splitting up two trees worth of Red Maple logs, I have a couple more cords of wood to store.
These things are great. They provide enough force to bust apart even the most stubborn sections of a tree, like stumps and sections with a lot of branches or multiple trunks.
Straight sections can usually be handled by a good manual maul like this one:
But the gas-powered 22-ton log splitter that works vertically and horizontally is the fella you want for big jobs and tough wood. In the vertical position, we were able to roll giant logs over and split them into three or four large pieces. Otherwise, we’d never be able to lift them.
Once the pieces were all broken into manageable sizes, we shifted to the horizontal mode so we could operate the log splitter without bending over all the time. I felt the log splitter was rather easy to use, fun actually, and it seemed very safe as long as you watch out for your fingers. The moving parts move very slowly. The most dangerous part seems to be the occasional log that snaps out at you if it gets bent during the splitting process.
That and your toes. You should wear steel-toed boots and watch out for falling log chunks.
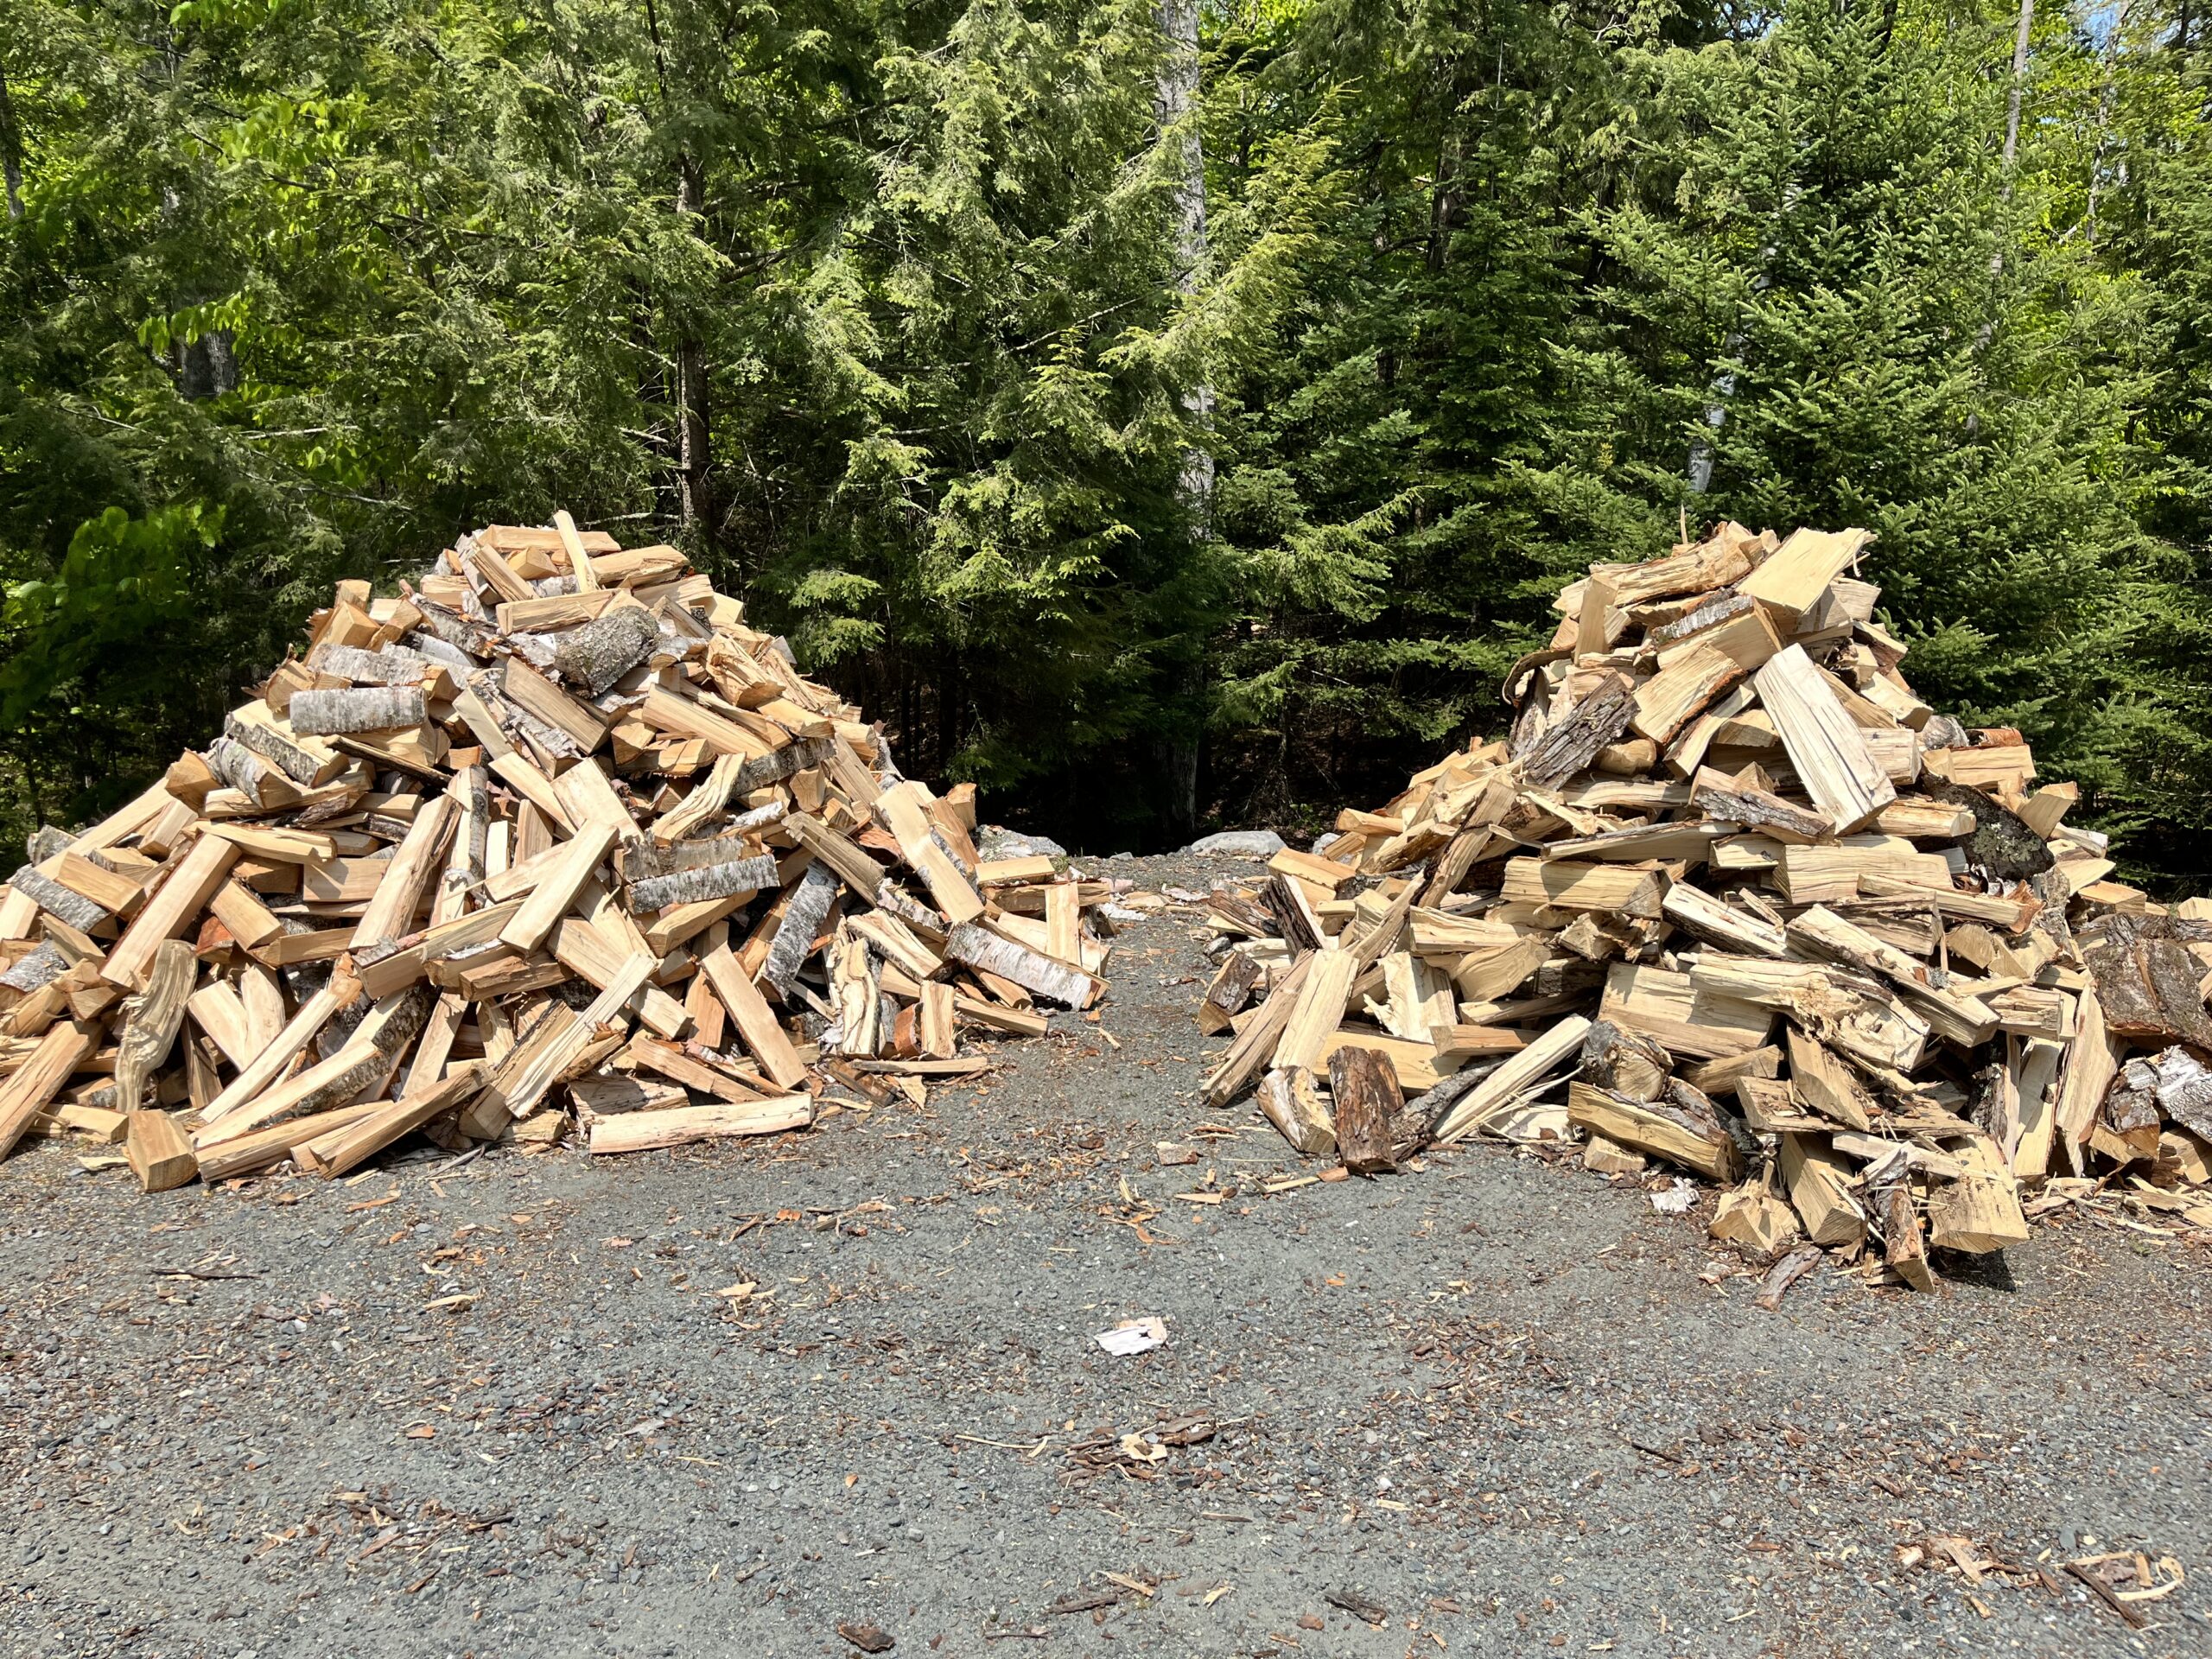
After filling up my new woodshed I was left with two giant mounds of split firewood.
Stacking wood without a shed or rack
My neighbor Curt suggested I try a Scandinavian method of firewood stacking which creates a beautiful round shape and doesn’t need any support other than itself. Ideally it would look like this:
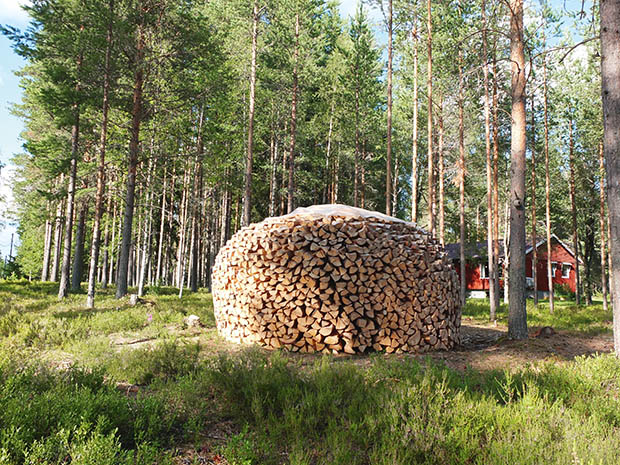
In Germany, the Holz Hausen wood pile is a fundamental way to stack and cure unlimited amounts of firewood without the use of a rack.
I used a rake to mark out a circle in the gravel of my driveway and then laid down a row of firewood to define the outside and create a slope towards the middle of the circle.
Wood shrinks as it drys and you want the structure to have a slight lean towards the middle.
Continue to lay wood on the stack and create a tightly packed layer upon layer. If the wood starts to lean out from the pile, lay some thing horizontal pieces to keep the angle pushing into the middle.

Once the stack is about halfway built, start tossing in all of those odd, little or twisted pieces into the middle. This is the genuis part of this method, no need to stack everything, just the outer edge.

Once the pile reaches shoulder height, start to aggressively (3 or 4 inches) place the pieces closer to the center. This will start creating the “roof” of the round wood pile.


Inexpensive, easy to build and sturdy wood racks that will last for years.
I’m going to build some simple firewood racks with these brackets I ordered from Amazon. They seem to be the most economical way to create wood stacks. I don’t like the tubular metal wood racks ones I’ve purchased in the past. The weak point is the bolts that hold them together. They rust and loosen over time and then they end up falling apart after just a few years.
With these firewood brackets, you just need to add some pressure-treated 2x4s in the length you want – 8, 12, 16 feet – whatever you need. Pressure-treated 2x4s cost less than $6 each for eight-foot lengths at your local big box store. I also picked up some concrete blocks to place under the brackets and in the middle of the lengths to get the wood up off the ground.
The beauty of using these brackets is their versatility. You can create long racks with multiple sections or even use the brackets at the bottom and top to create a roof.

I used two sets of brackets to make my wood storage rack extra strong and to create a roof. The roof can be covered in the wintertime with a tarp or I can build a small roof on it.
I kept my rack to four feet by eight feet. You can make them taller but you risk creating an unstable rack that can topple over on you.
I plan to add another rack in front of the other with some space in between.
My rack is eight feet long by four feet wide so it stores about half a cord of firewood.
