
NOTE: Restoration of a fifty-year-old electrical machine can be dangerous. Take all precautions so that you are not shocked or breathe in any lead dust or mouse poop.
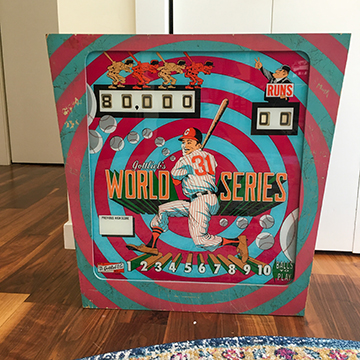
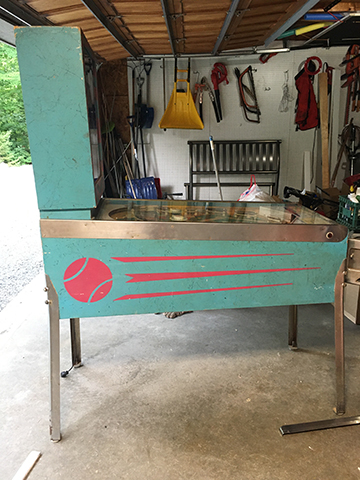
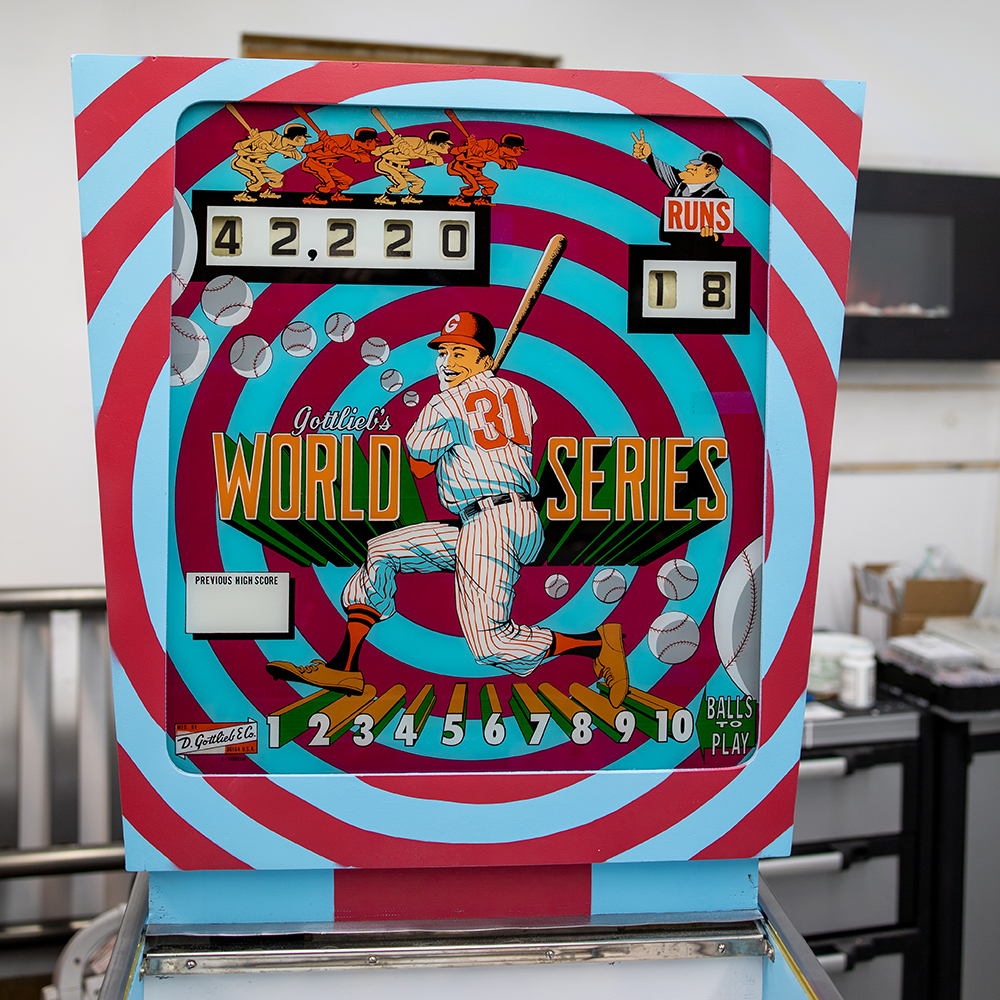
My second vintage pinball restore project after the Bally Hang Glider is a single player “Wedgehead” Gottlieb pinball machine named “World Series” and it has a baseball theme. Players can play for points, runs or a combination.
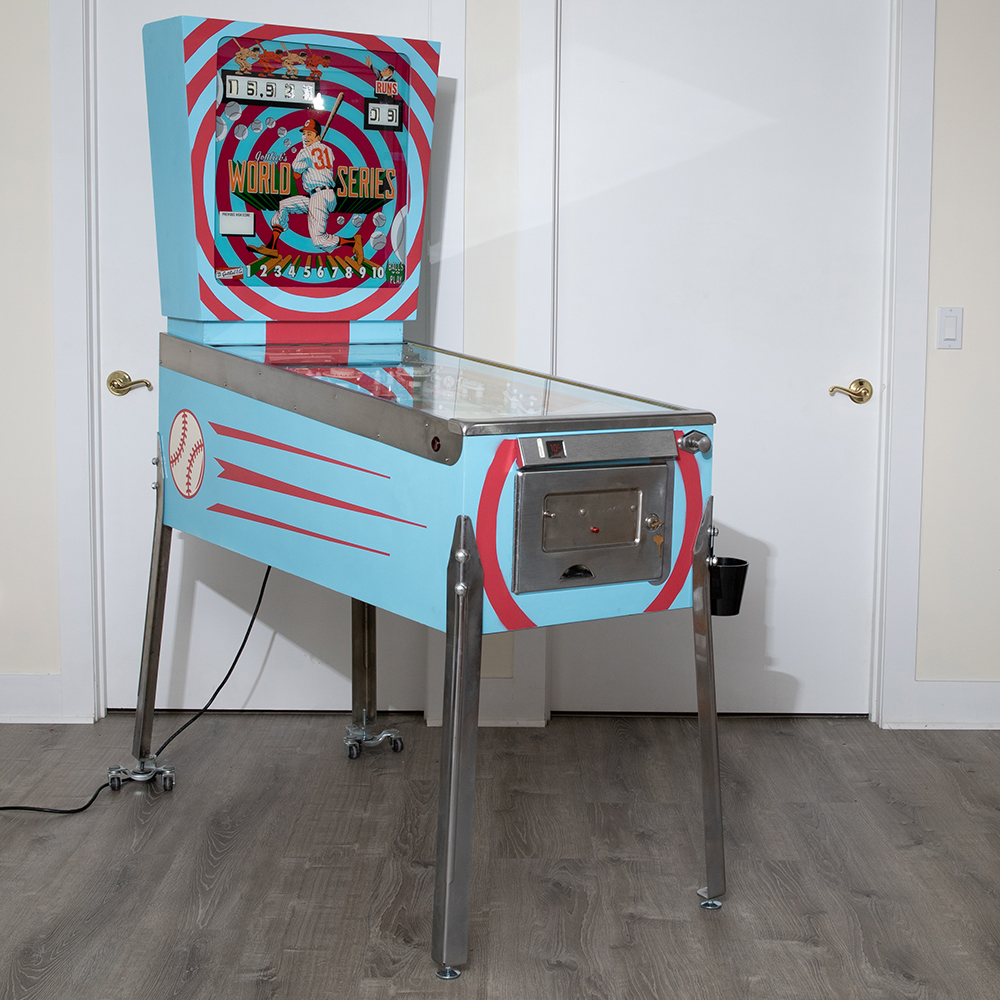
My son and I drove for about an hour and forty minutes to pick up this machine. What attracted me to it was the price, the condition (“working as it should” said the ad), the condition of the backglass and the fact that it is a single-player which makes it lighter and a bit smaller than a regular pinball machine.
Unfortunately, my CX5 can not transport a modern pinball machine without the hatch open the exhaust fumes coming in. Not a good look for a long haul. So for now my hunting is limited to vintage machines. Wrong! My 2015 CX-5 barely handled my Gottlieb System 3 “Wipe Out” from 1993 but recently picked up a 2015 Stern “Star Trek” Pro so it does handle modern machines, just not those extra-large System 3s.
About the Machine
Gottlieb’s “World Series” is the “add-a-ball” version of 1972 “Grand Slam”. Add-a-ball machines award extra balls for long play. It is a low production machine (only 775 machines manufactured) made for New York and Wisconsin states that outlawed “replay” pinball machines that could be sold. As in you could rack up a bunch of extra games and then sell them to the next player. Add-a-balls award extra balls that are perfect for home use anyway since a free game is worthless.
Initial Condition
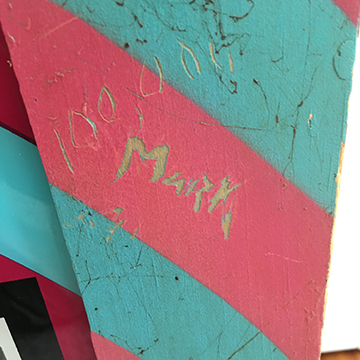
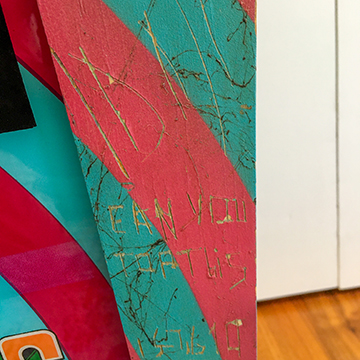
The ad said “working as it should”. When we arrived the seller had the machine already to go up on sawhorses without the legs on. We plugged it in and played a few balls. It started up, scored, most of the lights were on, the playfield was decent, the backglass was perfect, cabinet scratched, faded, and had people’s names dug into it. Overall nice for the price.
The owner had it in the family since 1976. Looked a bit neglected – dirty playfield scratched glass, o rings instead of a flipper rubber on one flipper, other white rubbers degrading and denigrating.
Got it home and played a game to get a better idea of the task ahead of us.
Assessment – Playfield, Cabinet, Electronics
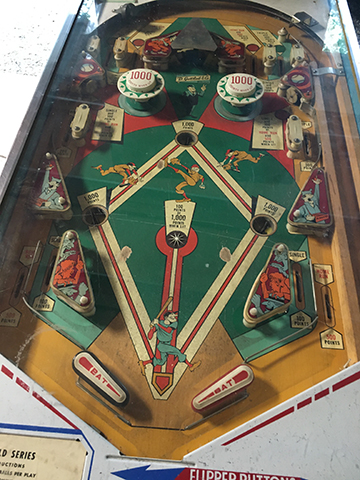
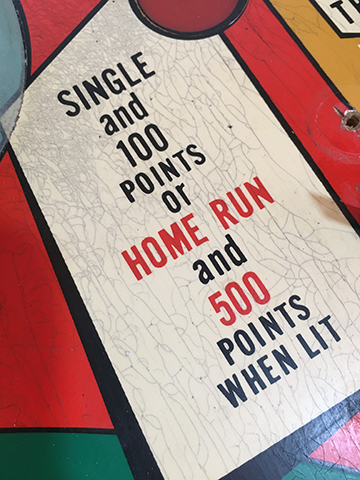
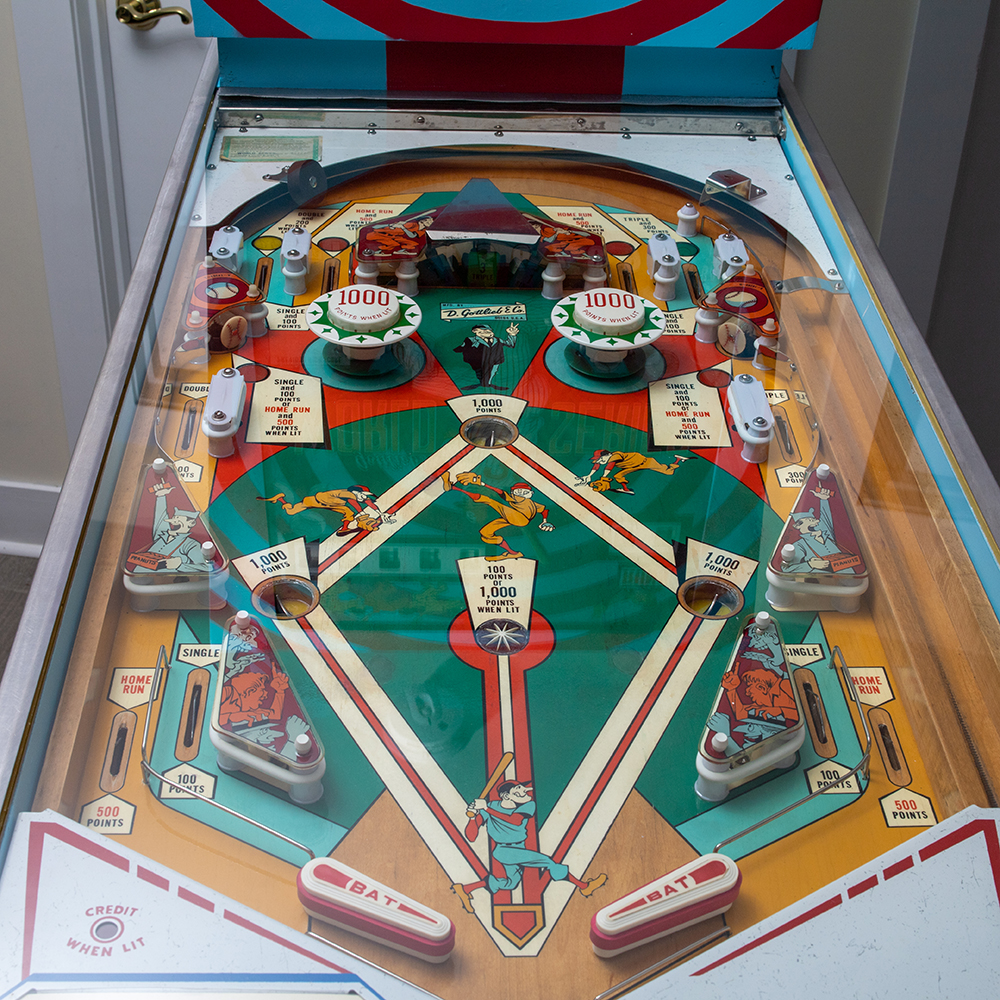
- Playfield is in good shape for its age. Printed plastics also – one crack found some yellowing. Backglass is pristine.
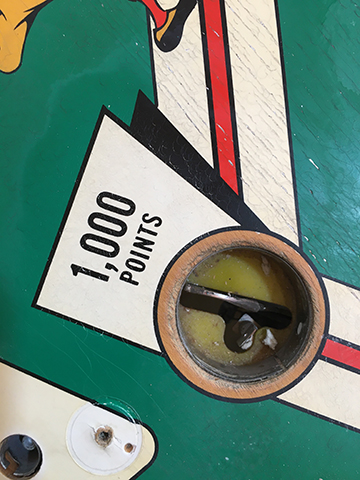
- Touch up of playfield only at three points near bases where the ball out kicker hole eject the balls.
- Clearcoat or playfield protector
- New lane plastics needed
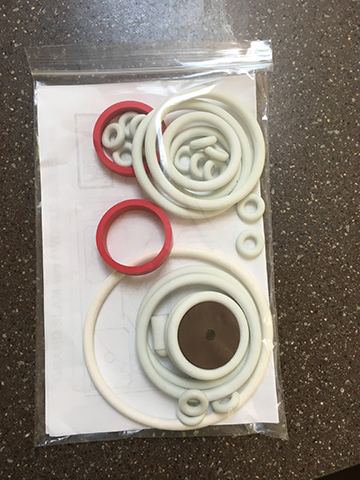
- New rubbers throughout
- New plunger spring – cleaning
- Vari-target a bit jerky – probably needs cleaning and PBR grease.
- Pop bumpers are lifeless. End of stroke issue says my pinball expert friend John.
- Hacks – haven’t seen any. I have to check the fuses to see if they are correct. Some evidence of spray lubricant used – I think. This is a no-no – it just attracts dirt and grime.
- Coin-door and lockdown bar is a bit rusty and grimy. Looks like a lot of beer was spilled in the front.
- I see some seeds as if a mouse found refuge in the machine at some point. And someone drilled a hole in the bottom of the cabinet for the power cord – not knowing how it is supposed to go I guess. I’ll have to repair that.
- Powdery yellow corrosion on some of the metal parts.
In contrast my 1976 Bally Hang Glider was D.O.A. when I got it and covered from head to two with a layer of dust as it lived under a barn for a while exposed to the elements. That took me a long time to get working.
This machine seems to mostly work fine so its a good candidate for a high-end restoration job. So let’s get started.
Work Log
- Did a quick clean of the outside cabinet. A layer of grim came off rather easily so that’s encouraging.
- Inspected the playfield and inside the cabinet making a note of things. Took some video for reference. Toss a few metal items into the tumbler.
- Took off the plastics, cleaned with a bit of water and dish soap. Stored in separate plastic ziplock bags.
Parts needed:
- New power cord – https://amzn.to/34qNjWe – Cut off end and solder to fuse and transformer. Attach ground to the base of the transformer.
- Foam rubber seal
- New rubber set – Marco https://www.marcospecialties.com/pinball-parts/RK1860-1 –
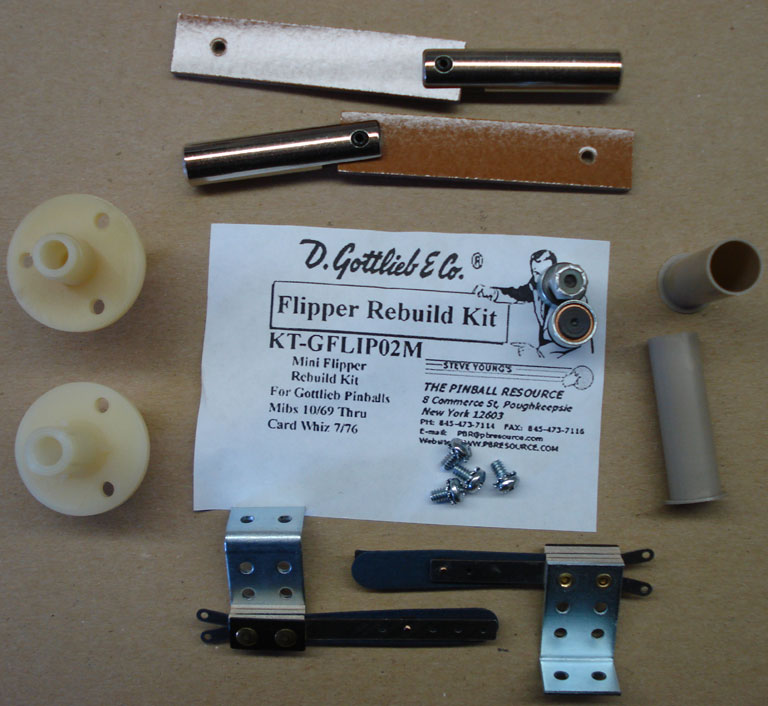
- Flipper rebuild kit – http://www.pbresource.com/rebuildkit.html
- Evaporust – https://amzn.to/334KOtE
- Cooler running Type 47 bulbs to replace the Type 44s used originally. A #44 bulb draws about 0.25 Amps. A #47 Bulb draws only about 0.15Amps and is only marginally dimmer. This can save your plastics and backglass. link
- Novus plastic and playfield cleaner – https://amzn.to/39yZceS
- Simple Green cleaner – https://amzn.to/2X62xwV – Careful around painted parts – I soaked a pop bumper in some of this and the paint came off.
- Mean Green cleaner – https://amzn.to/2EsFgyW – for really dirty cabinets.
- Ultrasonic Cleaner (plastic parts and initial cleaning of metal parts) – https://amzn.to/2X7Bn8T
- Vibrating tumbler for shining up metal parts – https://amzn.to/3hKzAP6
- Tumbler media – Crushed walnut shells for rough cleaning – Crushed corn cob for polishing to a beautiful shine.
- Tumbler additive – Flitz tumbler additive https://amzn.to/39GlawK
Cleaning Metal Pinball Machine Pieces
I attack grimy, rusty old metal on a pinball machine with three methods.
- Soaking in Evaporust to remove rust
- Small parts can be tumbled in a vibrating tumbler filled with walnut shell (for rough cleaning) and corn cob (for high shine).
- Hand rubbing with a metal polish such as Mothers – Mag & Aluminum Polish https://amzn.to/3gRiK14
Also good to have on hand are plenty of microfiber cloths for rubbing on polish and picking up dirt.
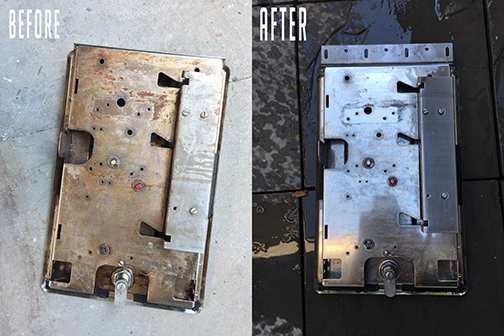
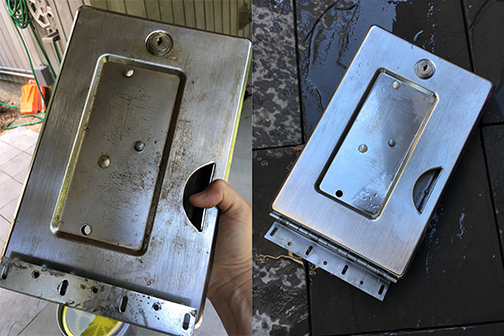
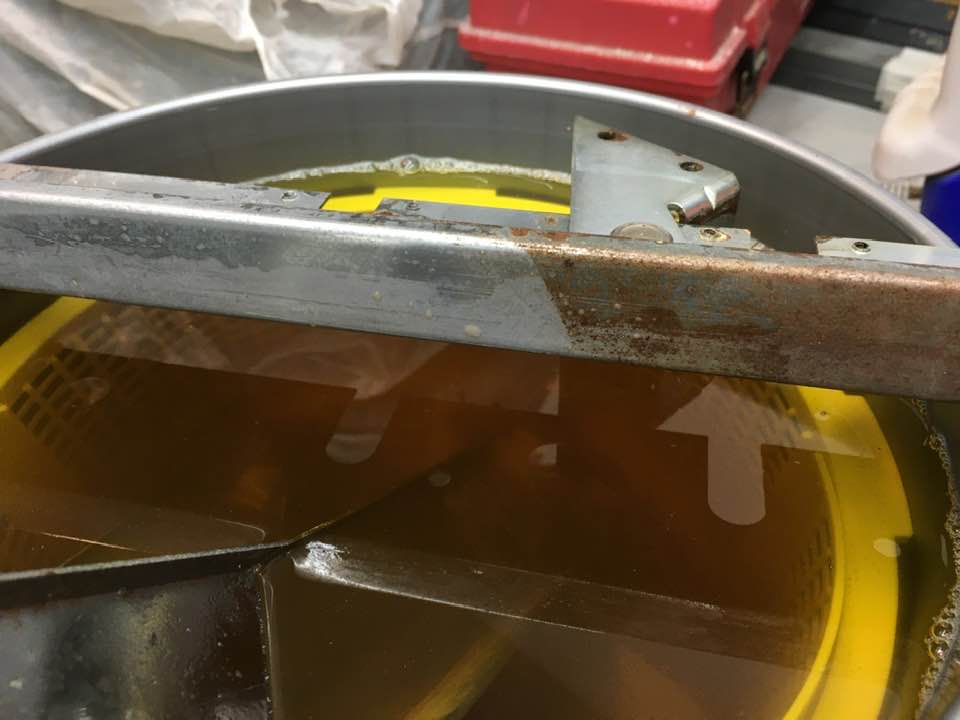
I buy my Evaporust in a 3.5 gallon tub that comes with a built in strainer. Perfect for larger items such as the coin door as well as smaller items. You reuse Evaporust over and over until exhausted and can always top off tub with smaller amounts if need be.
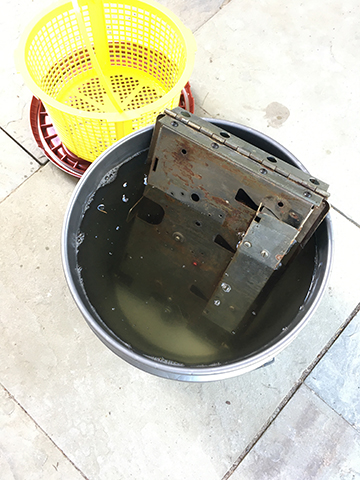
Here is the results of simply dipping the coin door in the tub overnight. You will need to rinse off the solution and then polish with Mothers. Smaller metal bits can be tossed in the tumbler.
Cleaning the playfield
Despite starting on a major project to renovate my garage (insulation and wall board as well as adding a lot more electrical outlets all around and add shop lights), I was tempted to start cleaning up the grungy playfield.
Lots of old yellowed wax, grime and years of coil dust cover everything. I removed all of the playfield elements, ordered new plastic posts from The Pinball Resource, ordered new playfield rubbers and got to work on the playfield.
- A quick clean using a microfiber cloth and some Windex
- Magic Eraser or equivalent and 91% alcohol (hard to find these days)
- Clean off of white residue left behind by the Magic Eraser with a microfiber cloth and a bit of lighter fluid and/or alcohol.
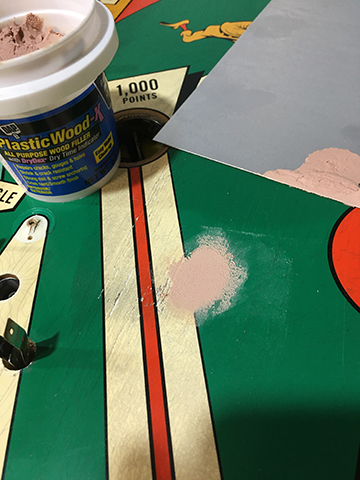
- I also filled in and then sanded the divots near the outholes with Plastic Wood filler.

I ordered some Montana spray paints which hopefully will be a close match to the “baby blue and magenta colors on the cabinet. I also order some stencil paper. Meanwhile, I started sanding the cabinet. Notice the color difference! The one on the left is after sanding off a layer of varnish and grime. Notice how grimy and yellowed the old finish is on the right.
Update
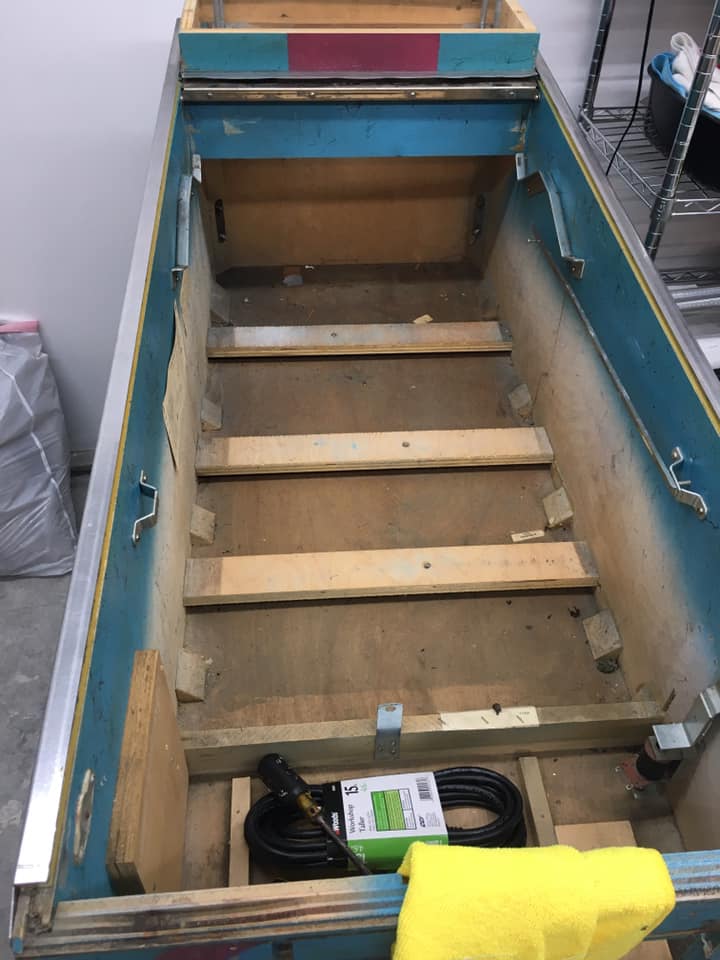
Been busy with the cabinet. Removing parts, tumbling parts. Shoring up the cabinet. Added a piece of wood at the back bottom to shore up a weak point. Filled in holes. Sprayed the entire inside white – easier to find dropped screws etc.
Created a stencil for the side art using Grafix Silver Dura-Lar Film Roll and an X-acto knife. The artwork on World Series is rather basic so this method should be fine. The circles on the head might be tricky…
Sanded down the cabinet and primed it with Original Kilz Primer spray, don’t use waterbased as it will raise the grain.
Took out the backglass which is pristine! Cleaned carefully with water and a bit of dish soap. Took off the black foam residue with Goof Off FG653 Professional Strength Remover, Pourable 16-Ounce,Liquid as much as possible.
Will spray with Krylon I00500A00 12-Ounce Triple Thick Clear Glaze Aerosol Spray,High-Gloss on the back to keep it pristine. Also will install LED lights in the head to reduce heat.
Clear Coating the Playfield
Clean off all wax with Naphtha.
Clean ball swirls with “Magic Eraser”
Before spraying, be sure that no silicon product was used on the playfield. If there is any remaining silicon, the clear coat will not stick. Always do a light sanding and cleaning before applying the clear coat and read all safety precautions - this is nasty stuff!Clear Coated the playfield with:
Take all precautions – wear a serious mask and use in a ventilated area.
Side Rails
Side rail nails are twisted and hence hard to pull out without damaging the stainless steel side rails. You can buy new ones but they are expensive. I tried a variety of tools and found the Dewalt mini pry bar to be the best.
Be kind to future owners of your pinball machine or even to yourself if you ever need to remove the side rails in the future – use screws:
Also to clean up grimy side bars, legs etc – you can use this kind of Scotchbrite pad kind of drill bit. Always work in the way of the “grain”.
Electrical Issues
I knew the machine mostly worked but had some minor issues so I concentrated on the messier cosmetic issues while the weather was good and I could work outside painting and cleaning.
Now we were ready to fire it up but first I swapped out the scary battered old non-grounded power cord for a new one, put in the proper fuses and grounded all the metal parts of the machine – coin door, legs, lockdown bar and side rails.
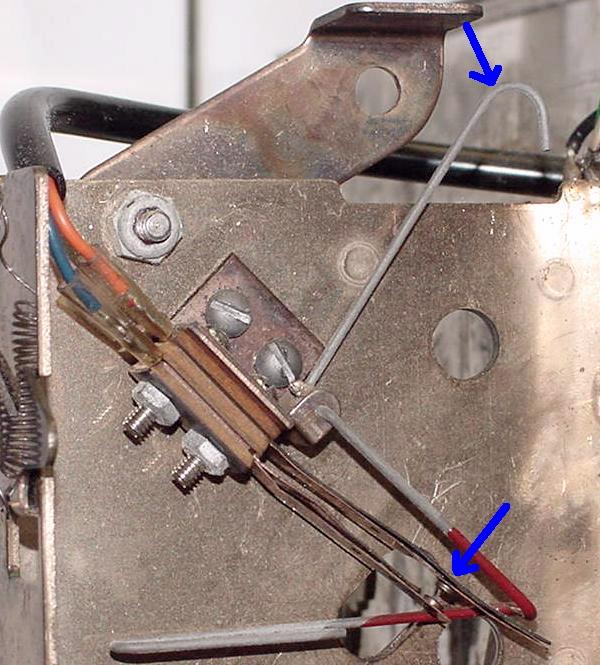
I also found a broken EOS switch on one of the pop bumpers so I Macgyvered a new one by soldering a piece of an old leaf switch from my parts bin on to the broken one. It worked as a temporary fix until I can order a new pop bumper switch assembly from Pinball Resource.
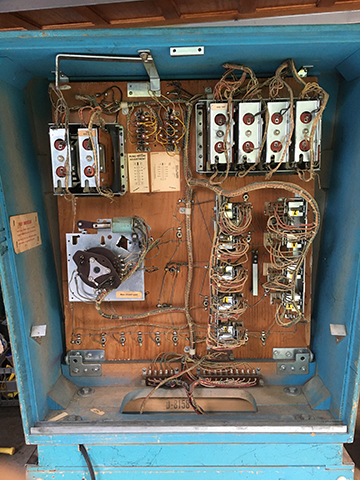
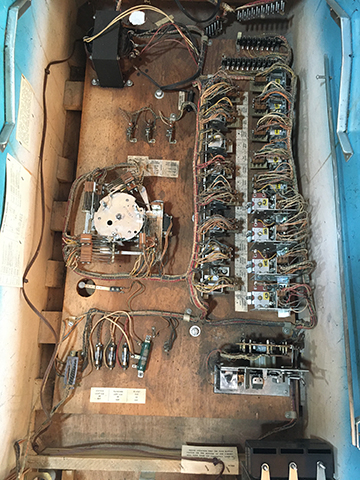
Started up the machine, lights came on but then the ball count unit kept firing repeatedly. Luckily my EM expert and electrical engineer friend John Day was visiting soon so I had him look at it.
He traced the problem one of the score motor relays in the head.
Game worked although there were a few problems:
- Chimes weren’t working – I traced this to some dirty connections on the 10, 100 and 1000 point relays in the head.
- Players were not advancing around the bases. Something was wrong in the relay board.
- Flippers were weak – needs a rebuild kit and perhaps “orange dot” coils from PBR which give about 5% more power than the originals.
- Outhole kickers are loose – no real solution available at the moment.
- Roto-target needs some attention – new springs, cleaning, lube
- Pop bumper needs new coil sleeves and general cleaning – plus new EOS or end of stroke switch
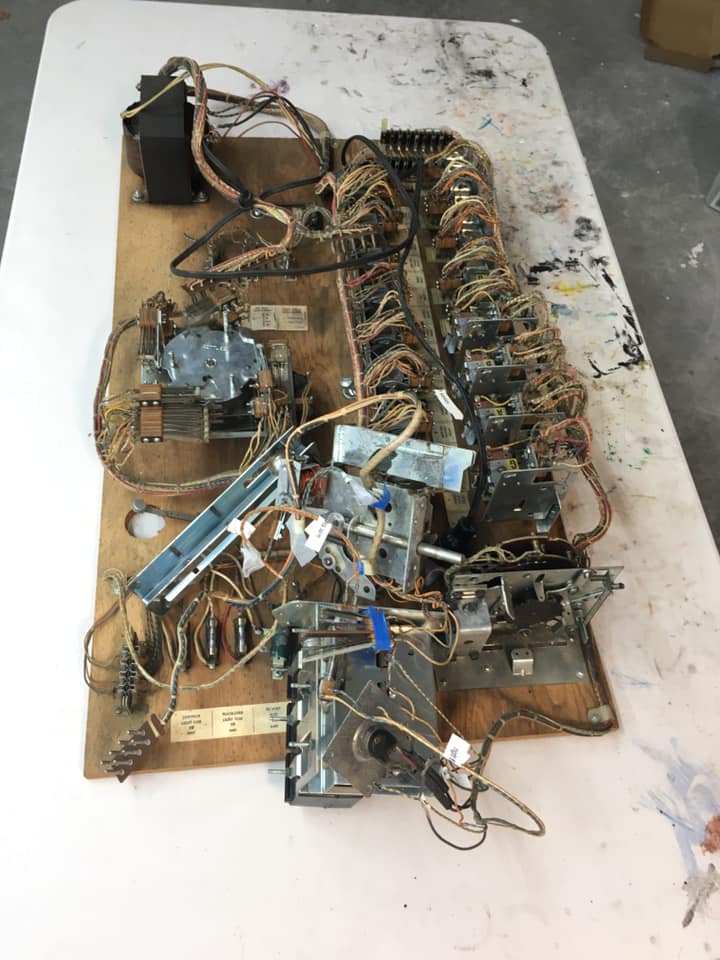
Initially, I didn’t go through every relay ( I didn’t want to create any new problems before testing) so I pulled the relay board and settled in for a few hours of cleaning every contact with alcohol and Q-tips and looking for any switches that needed adjusting.
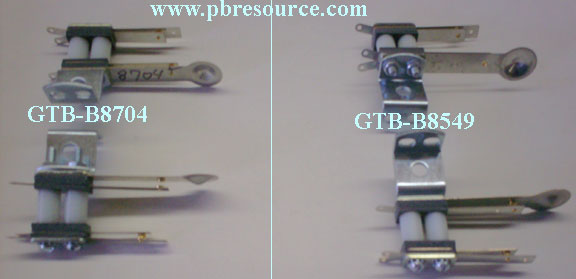
I did find two issues. One a wire was disconnected, so I soldered it back on. Second a “Nylon Switch Blade Lifters“ was missing on one of the switches. I have to order one from Pinball Resource – they offer nine different sizes so I might just get a selection to have on hand.
Under the playfield discoveries
Pop-Bumpers: one broken linkage, broken EOS switch, broken spring, worn bakelite piece and linkage
Hole kickers – general dirt and wear. Cleaned and installed new coil sleeves.
Flippers – Mismatched coils. General wear and dirt. Installed “orange dot” coils from PBR which give 5% more power. Installed flipper rebuild kit.
Power switch – Broken and bypassed. Installed new on/off switch.
Issues
Problem: No power to flippers or pop bumpers
Solution: Following the schematics tracing the power flow from the transformer to a switch on the HX relay. Leaf switch was cleaned and adjusted. Power restored.
Tilt?
Closing the coin door was causing the Tilt Relay to fire repeatedly. Some kind of short from the coin door frame back to the rely? Nope, everything is grounded. Turn out it just appeared the problem was caused by closing the coin door. S
The slam switch detects abuse to the front of the machine someone giving it a kick. The slam switch on the coin door has to be closed or the game shuts down. Checked the switch, cleaned it and alligator clipped the leads to make sure it was closed. There must be a weak spot somewhere along the wires leading to the coin door switches.
Solution: Seemed to be the slam switch on the relay board which is there in case some knuckle head kicks to the bottom of machine. When I shut the coin door, there was just enough movement to trigger the switch. I soldered a wire between the three slam switches on the coin door, relay board and head.
No base lights
World Series has three kickout holes at first, second and third base. When you land in a hole it lights or if you hit a single, double or triple switch. The lights move as you score more bases.
This is an important feature because if you get the bases loaded and then hit a home run you are awarded 5,000 points and 5 runs. It also lights the pitcher mount star roll over for 1,000 points.
Only the second base was lighting. Latch relays A, B and C control this function. I cleaned the four latch relays and check their function and got the bases running and lighting. The latches can get gummed up or dirty.
Pop Bumpers Staying On
The left pop bumper seems to be the cause of this problem of the pop bumpers sticking on every once in awhile requiring the machine to be turned off before the coil burns.
Any number of things can cause this:
Magnetized coil stops/plungers
If it “sticks”, but you can make it unstick with light upward pressure…there is a good chance that something is magnetized.Disassemble. Hold the coil bracket in one hand.Strike it crisply with a glancing blow with something metallic like a steel rod. This “knocks” the magnetism out of it. You can do the same for the plunger, but be careful to not dent the part of it that pulls into the coil sleeve.
Or any of these five problems – https://user.xmission.com/~daina/tips/pub/tip0284.html
What really happened – turned out the problem was none of these. Looking closer at the pop bumper and found the screws on the bracket had wiggled loose! Tightened it up, adjusted the end of stroke or EOS switch and everything worked again.
No Free Play?
With most EM pinball machines you can find the credit wheel and locate one of the switches the indicates credits are available and alligator clip it together for free play.
Add-A-Ball or AAB pinball machines like World Series don’t award replays so there is no credit wheel. AAB games award free balls.
My World Series had two buttons on the front (coin reject and credit button) and a coin slot. Drop a coin and it would hit a switch to start a game. It is set for two games per coin. So you use the credit button for the second game.
The trick for free play is to make the coin reject button activate the switch in the coin slot.
Here is the solution:
Noisy Roto-Target
The Roto-Target took a lot of cleaning, spring replacement and adjusting to get it working well. Still occasionally doesn’t snap into place but it is tolerable. Only issue remaining is that it make a loud buzzing noise when activated. I replaced the coil stop which somewhat reduced the buzzing noise.
Completion
Here is what World Series looks like after the full restore.

Reference Links:
Parts – The Pinball Resource
Parts – Pinball Life
Canyon City Pinball World Series Restore – Cabinet: https://canoncitypinball.blogspot.com/2019/03/1972-gottlieb-world-series-pinball.html#comment-form
Canyon City Pinball World Series Restore playfield – http://canoncitypinball.blogspot.com/2019/03/1972-gottlieb-world-series-pinball_19.html