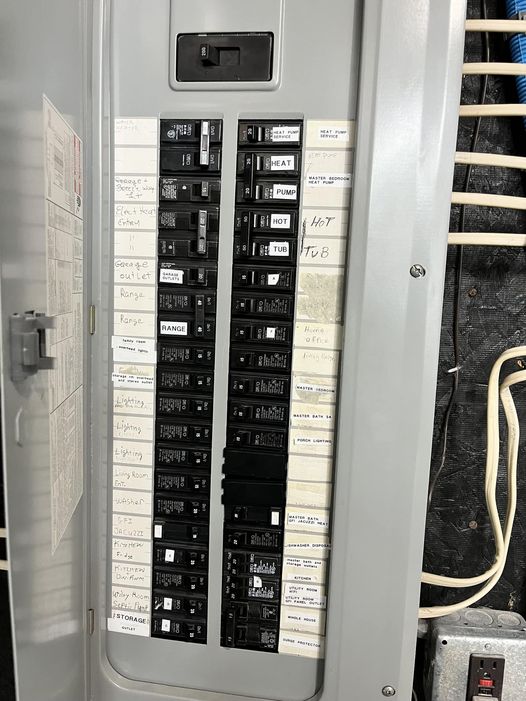
I’ve been electrifying the house over the past several years and my 200 Amp 40 space load center is getting full. It seems every time we have some work done the electricians use up another breaker spot or two.
When we moved into the house we probably had five open breaker slots. Then we got a hot tub so that took up two spots. -2 slots
Then we added a heat pump in the master bedroom. That took two slots for the heat pump and they added an outside service outlet next to the heat pump for any future maintainance visits -3 slots.
Then we went from an indirect hot water holding tank off the propane boiler to a hybrid hot water heater. That took another breaker. -2 slots
We added a solar array on the roof and a Tesla Powerwall battery backup. No breaker use. The whole solar stuff happens before power reaches the main ciruit braker. 0 slots
Two breakers are used up by the huge twenty five year old spa tub that came with the house. When we start our master bathroom renovation, that will be going so we’ll free up those two breakers. +2 slots
We installed a heat pump combo washer dryer that plugs into a standard outlet instead of a 220 dryer outlet so that freed up some breakers. +2 slots
I installed an Eaton whole house surge protector which takes two breaker slots. -2 slots
In the future we want to go from a gas stovetop/electric oven which might use another breaker or two. But we might be good with our existing two breakers used by the current oven. 0 slots
We also plan to install an heat pump for the main living area so that will take up a few circuit breaker slots. The installers will no doubt add a service outlet on that side of the house. -3 slots
And we might end up with an EV (or two) in a couple years. This might mean adding another subpanel in the garage either off the main panel or daisy chained off the subpanel. -2 slots
So you can see we will be needing something like 8 – 10 slots when everything is said and done.
So I think a 12 breaker subpanel off the main breaker box is a good idea and something a home owner can handle if they take time to do things right and follow the electrical code.
I picked this Square D – HOM1224L125PGCVP Homeline 125 Amp 12-Space 24-Circuit Indoor Main Lugs Load Center with Cover as a Value Pack which includes the grounding bar and two 20 amp breakers. The grounding bar is sometimes an additional purchase as well as the breakers – so why not just get the value kit? Also, this subpanel is Plug-on Neutral Ready which makes adding arc fault breakers easier to add.
An arc-fault circuit interrupter (AFCI) or arc-fault detection device (AFDD) is a circuit breaker that breaks the circuit when it detects the electric arcs that are a signature of loose connections in home wiring.
– Wikipedia
The 100 Amp two pole breaker will be installed in the main breaker box (-2 slots) to feed the subpanel. Another reason to add a subpanel — get it installed before I ran out of the two slots needed for the subpanel.
Here is my list of materials:
- Square D – HOM1224L125PGCVP Homeline 125 Amp 12-Space 24-Circuit Indoor Main Lugs Load Center with Cover – Value Pack (Plug-on Neutral Ready) https://amzn.to/3UfDINl
- 100 Amp two pole breaker https://amzn.to/3u52Wnd
- White electrical tape – https://amzn.to/3I0GTS5
- Wire cutters/Mini Bolt cutters – https://amzn.to/3vSsVyy
Safety equipment
- Maxi flex gloves – https://amzn.to/3vRpl82
- Eye protection – https://amzn.to/3ShSVei
- Rubber soled shoes
I am following this excellent guide on YouTube:
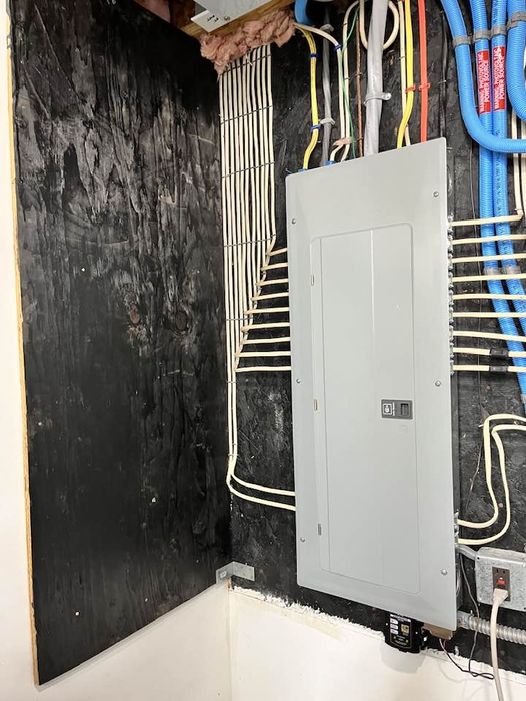
Step One – Preparing the spot for the new subpanel
By code subpanels need a certain amount of space around them for electricians (and non-electricians) to work. They also have to have space in front of them and they can’t be placed too high.
You can look up the exact code measurements but in theory, they can’t be out of reach in case they need to be shut off and they need space around them to run wires and bascially work. The code exists so electricians can work on the panels easily. For example the door must open 90 degrees and the top breaker can’t be more than 6′ 7″ off the floor. Comfortable working height and positioning is the goal.
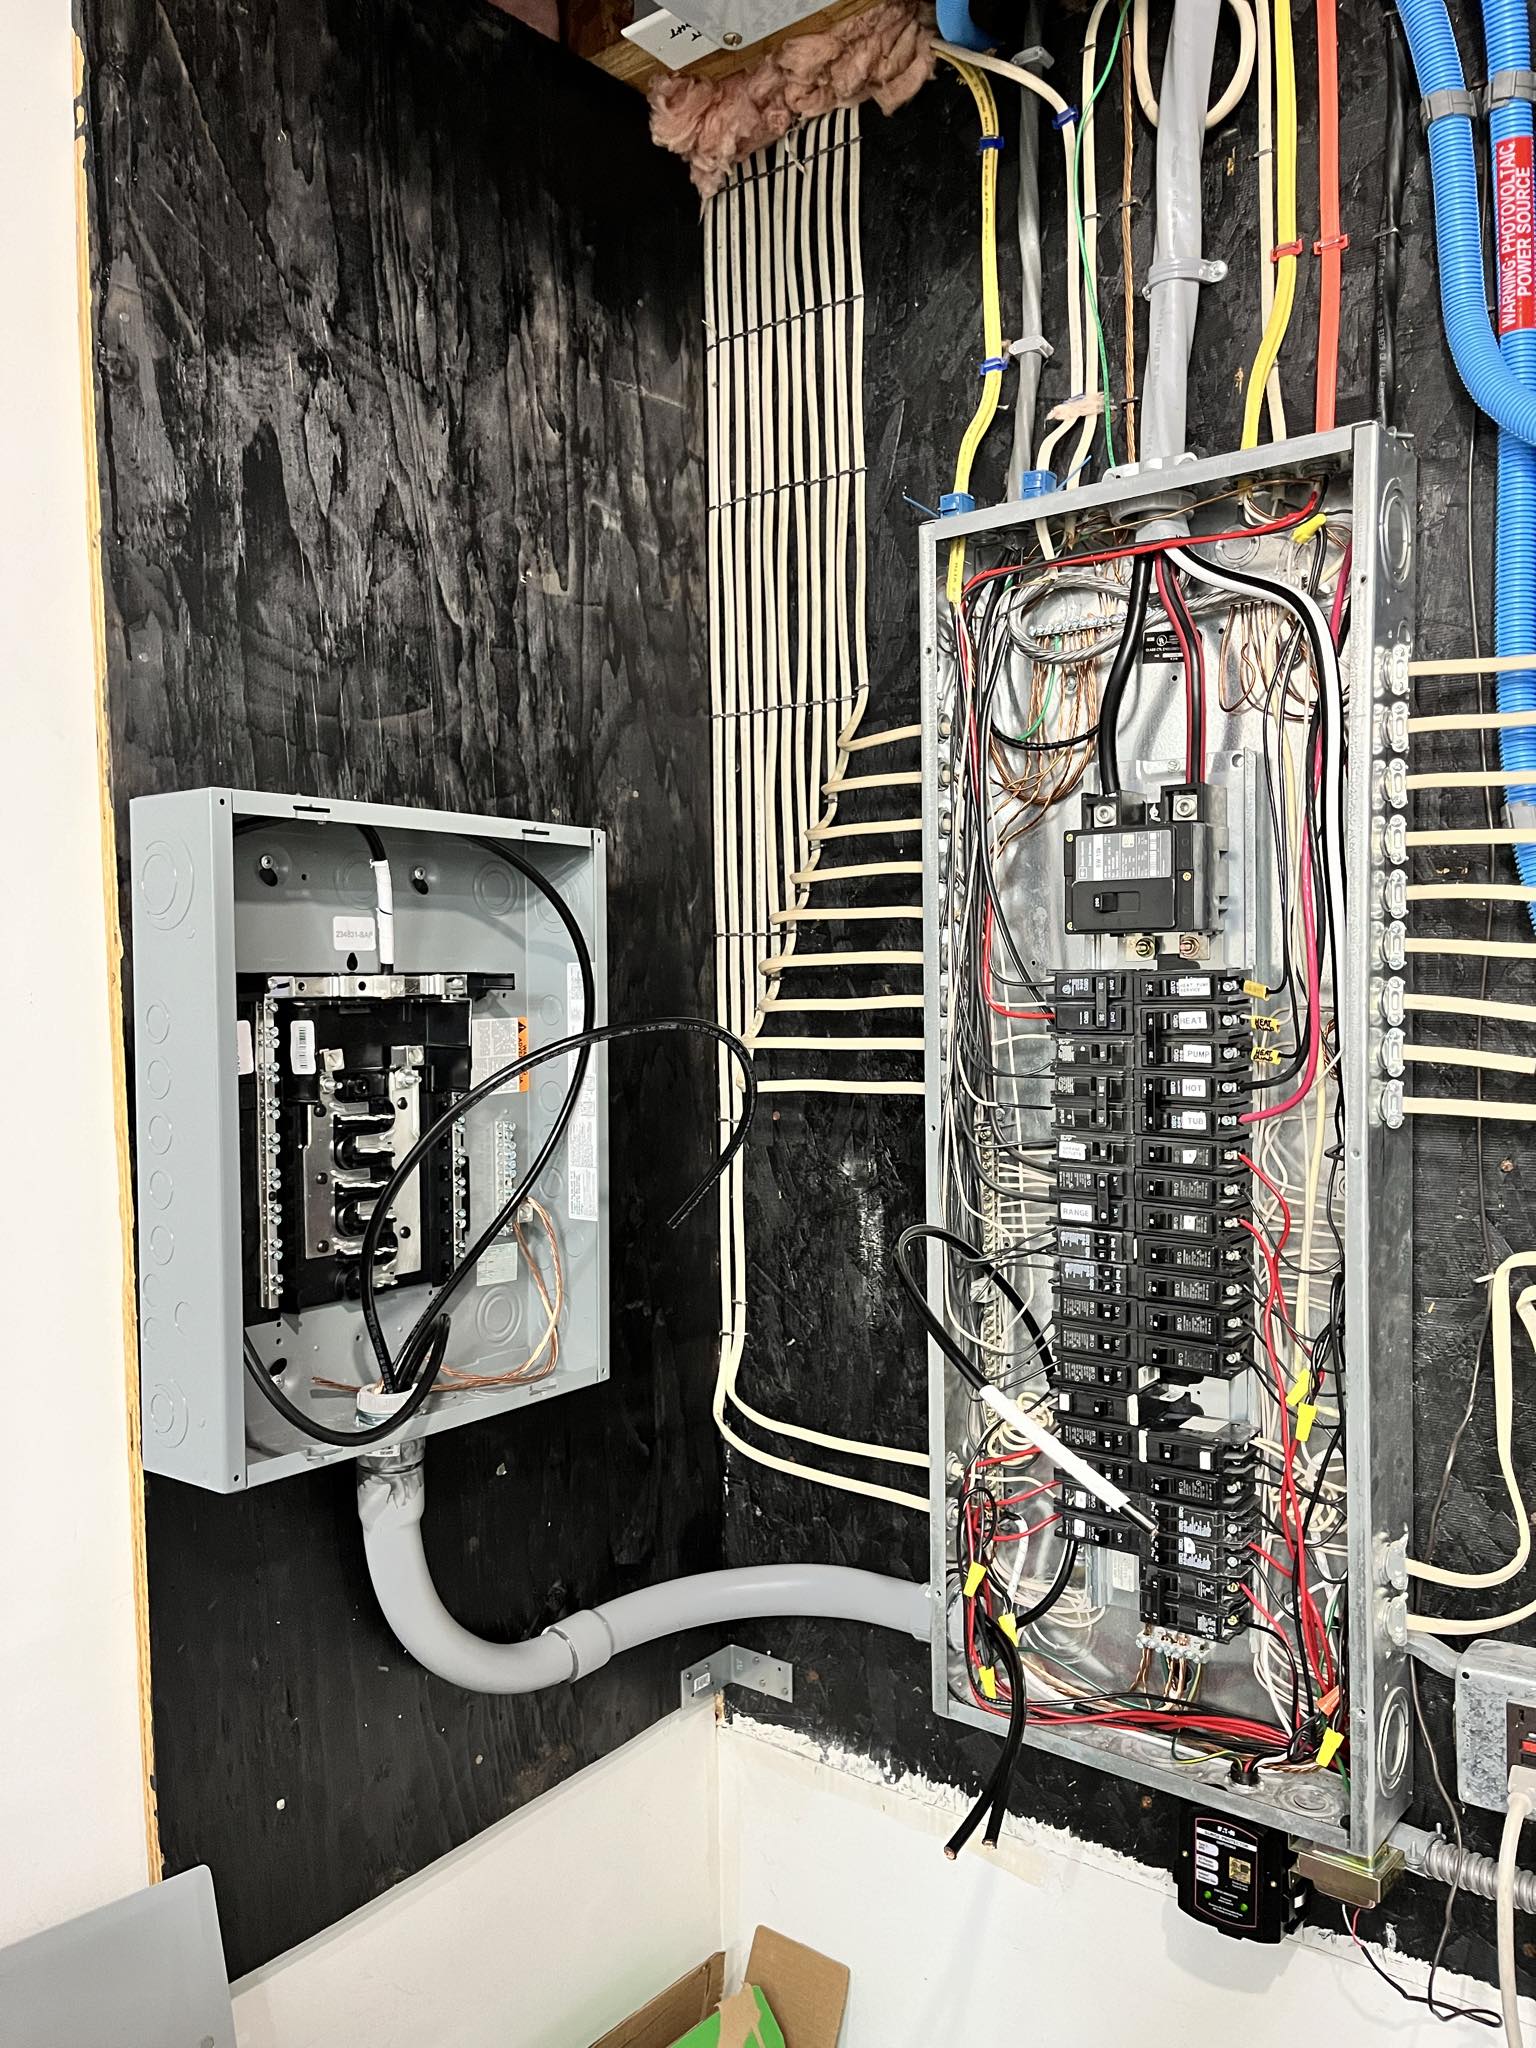
I put up this black painted plywood panel to match the work in the rest of the utility room. Basically this gives one a solid surface to staple into and the black makes the wires stand out.
Notice the excellent neat and tidy wiring job from the original circuits. I’ve never owned a house with such well layed out wiring – most of the houses I’ve owned were older with a rats nest of wires.
The yellow wires are outside lighting which added about a year after the house was built.. The blue tubes are the PV or solar electricity coming into the house from the solar panels as well as power coming and going from the Tesla Powerwall storage battery. Orange goes to the hybrid or heat pump hot water heater.
Getting to work
Tool a trip to Home Depot and picked up two 90 degree PVC 1 1/4 inch conduit pieces, some PVC glue, and various fittings. I picked up six feet of 6 gauge copper braided grounding wire and 18 feet of copper braided 2 gauge wire with black coating. Three gauge would have been up to code but Home Depot didn’t have it. I also picked up some white electrical tape to mark the wire that will be the neutral.
Back home I knocked out the holes for the conduit. Unfortunately on the main panel a larger knock out came off so I had to go back to Home Depot for a reducer washer – 2 inch to 1 1/4.
Home again – After dry fitting the pieces and triming one of the 90 degree pieces, I figured out where the subpanel would go and glued up the pieces with PVC cement.
You have a few minutes to work with the fittings to get them into place, then allow 30 minutes for the cement to dry.
I cut the 18 foot length of two gauge into three pieces using a flat angle cutter and a hacksaw. It’s tough to cut through two gauge wire!
After turning off the power, I ran the ground, two blacks and the marked neutral through the conduit. I connected the ground between the boxes. I also connected the neutral to the sub panel.
Lots of improvements. Well done !